If you are looking for websites for Christmas fun, check out http://technologyrocksseriously.blogspot.com/2011/12/christmas-sits-galore.html and
http://www.santalady.com/xmasgame/xmassong.html.
Btw, Sumdog.com allows you to set up math fact challenges and competitions for your students where they can compete against another class in your building or against classmates. Mine love it. I plan to set up competitions/challenges for them to participate in over the break.
Wednesday, December 21, 2011
Tuesday, December 13, 2011
Math Web Site
We tried sumdog.com today. A teacher account is free. The kids loved playing the multiplication games on there as they could play their classmates. I'm still learning about the website but what I've seen so far is worth the time to check it out.
Friday, December 9, 2011
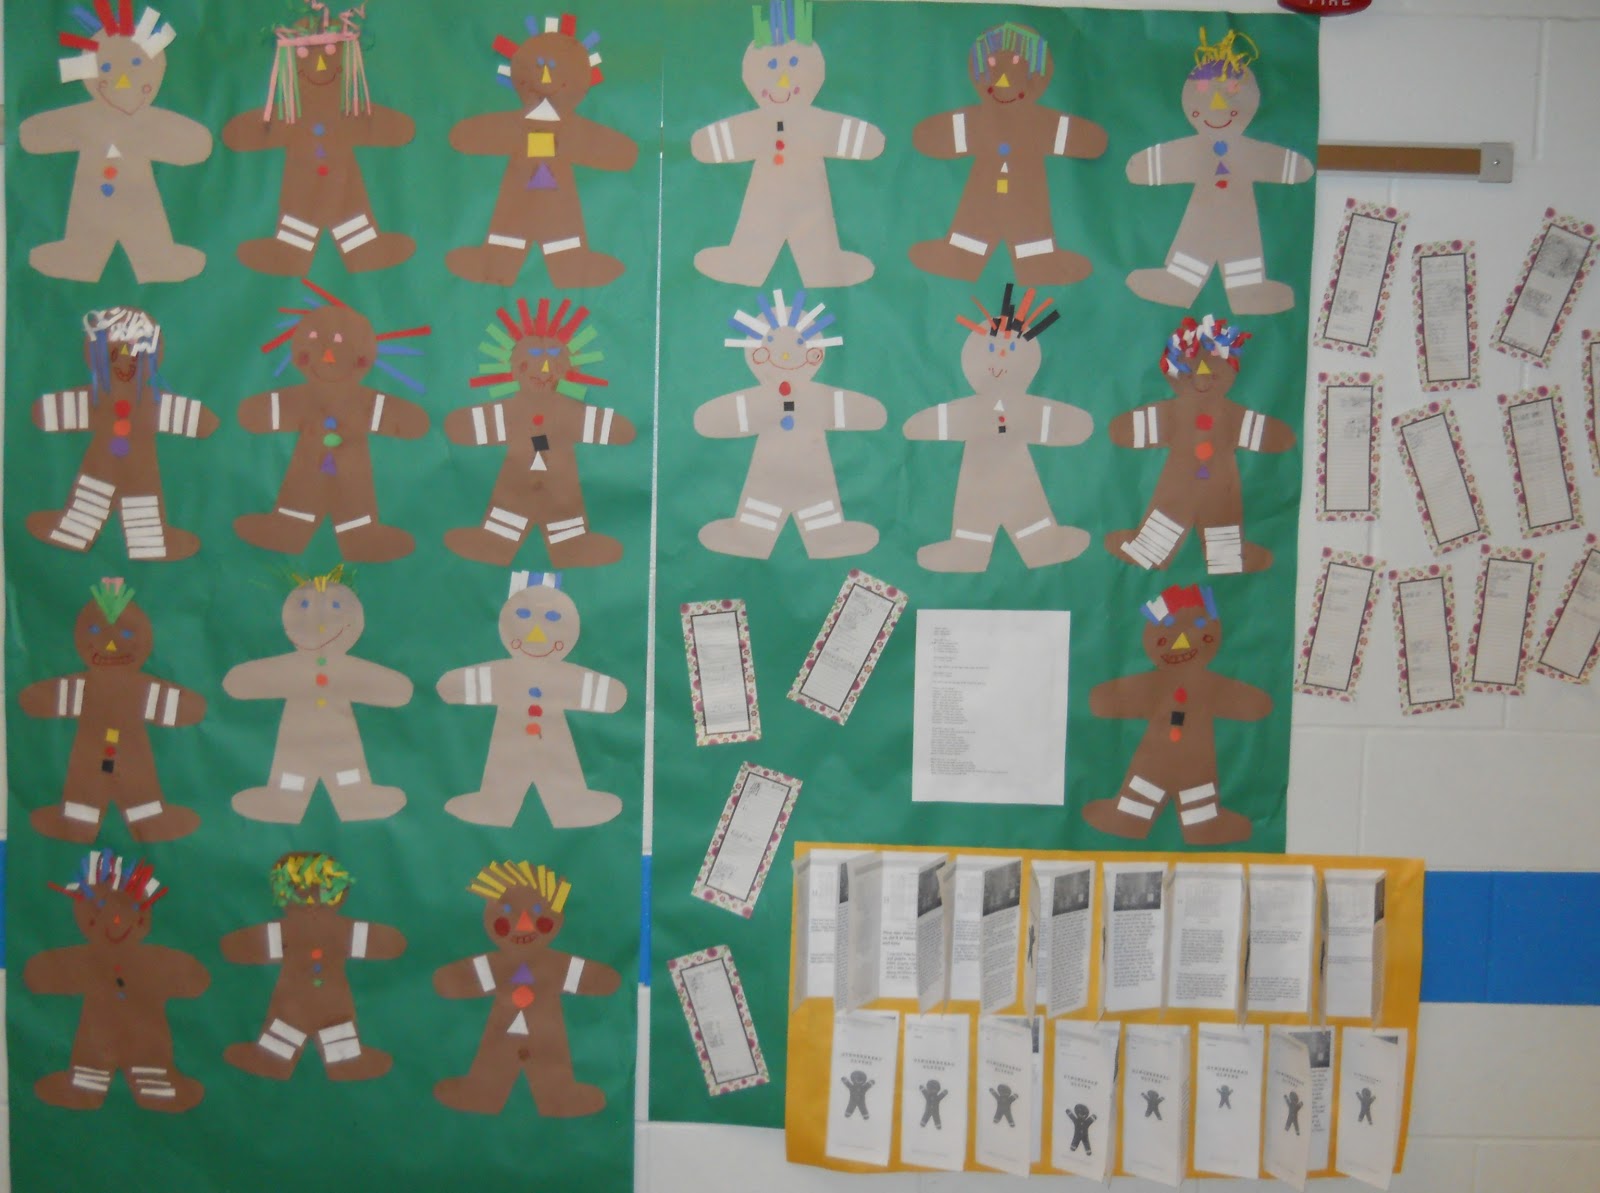
Gingerbread Glyphs and More
Gingerbread glyphs are a great way to brighten the hallways and combine reading and math. The glyph I like to use is from Mailbox. I found this link and used it this year. http://teachers.net/lessons/posts/1415.html
I asked the students to highlight their responses on the form. I let them choose three from the "things I like to do" list. The ages didn't fit my classroom so I changed them to fit.
After constructing the gingerbread man, each student was assigned one of the questions to collect data. We discussed tally marks and how to bundle them and why. We talked about how many tally marks should end up in the data collection.
We used the collected data to create a graph using the data. We used http://nces.ed.gov/nceskids/createagraph/default.aspx. Students downloaded their graph as a jpg file.
Next we opened Publisher and clicked on a brochure template. We deleted a lot of the information on the brochure and created our own text boxes. Adding a clip art picture of a gingerbread man added a little extra fun to our project. Each student inserted the graph they made and created a text box under it to analyze the data in their graph. Students inserted a graph from a classmate from each one of the questions. They created a text box to write about what they liked about the project and what they learned. We had one side of the brochure left so students wrote a story about their gingerbread man.
Thursday, December 8, 2011
Editing Stories Using Review/Comment on Word
In the past I had the students print their articles/stories and then I would edit with them using the paper copy. It was a struggle to get them to make the changes on the computer. I don't know why. Some would do it. Others would fix one thing and tell me they were done. We wasted a lot of paper, ink and time.
Finally decided to try the review section of word and add comments to the students' documents. The biggest problem was students deleting the comments. I'm looking for suggestions on how to stop them from doing that. Otherwise, I think this is the way to go from now one when editing the stories.
Finally decided to try the review section of word and add comments to the students' documents. The biggest problem was students deleting the comments. I'm looking for suggestions on how to stop them from doing that. Otherwise, I think this is the way to go from now one when editing the stories.
Monday, December 5, 2011
Water Cycle Story
We are writing stories about the water cycle. Students are using a drop of water as their character. Their character has to have a name and feelings. We've worked on using similes and sound words in our stories. This story will allow us to pull those in along with demonstrating our knowledge of the water cycle. We are also working on transitioning from one part of the story to the next without using transition words of next and then. After the stories are done the students will get to illustrate the story using Paint. They will create a background that will be used for every page of the story and the background has to match the setting of the story. The stories and illustrations will be used to create a PowerPoint presentation. Then the slides will be turned into jpg files and used to create a PhotoStory3 presentation. This gives us the opportunity to use the PowerPoint program and PhotoStory3.
Student examples: http://mrscooksfantasticfourthgrade.blogspot.com/2012/01/some-more-water-cycle-stories-1-2-3.html
http://mrscooksfantasticfourthgrade.blogspot.com/2011/12/water-cycle-movies.html
Student examples: http://mrscooksfantasticfourthgrade.blogspot.com/2012/01/some-more-water-cycle-stories-1-2-3.html
http://mrscooksfantasticfourthgrade.blogspot.com/2011/12/water-cycle-movies.html
Thursday, November 17, 2011
Word Problems - Signal Words


We worked on reviewing signal words for addition and subtraction word problems. While this seems pretty basic and I know that not all problems will contain these words, too many students don't understand which operation to use.
Each student created two word problems using two different signal words for addition and then for subtraction. They used Publisher, printed and then cut them apart. We glued them to butcher paper to display in the hallway. The kids loved that the number sentence was upside down on their screen. I showed them how to rotate it and some forgot to rotate it back.
When printing, don't forget to change the screen to two-sided. Below is an example of page 1 in the Publisher file.

Here is page 2 as it would look on the screen.

Wish I would have outlined the pictures so you could see them better. The first page text boxes were near the bottom of the landscaped page, the second page boxes were at the top.
Signal words we used were: addition: altogether, added, total, in all, plus, sum; subtraction: left, how many...more...than, how many...less...than, difference, lost, shorter, longer
Monday, November 14, 2011
Earthquake tremors in Kansas
After feeling tremors in Kansas from the Oklahoma earthquakes, the students were really curious about earthquakes. We did a little research and then completed a graphic organizer comparing earthquakes to tornadoes. The information was used to write compare/contrast sentences. Students highlighted the compare/contrast signal words. We added a topic sentence and a concluding sentence about which they would rather experience and why. The paragraphs turned out great. The students used Word to publish their paragraphs.
The venn diagram in the middle of the picture is NOT mine. I had the website address on the paper in the hallway, but now I can't find it to put it on here. I'll keep looking as it is a great resource and the creator needs credit for it.

The venn diagram in the middle of the picture is NOT mine. I had the website address on the paper in the hallway, but now I can't find it to put it on here. I'll keep looking as it is a great resource and the creator needs credit for it.

The sticky notes are from our instructional coach. She wrote comments and questions on some of the paragraphs. The kids loved it. Thanks, Jamie!
Thursday, November 3, 2011
More on Biography Project
Tomorrow I hope the students get the videos filmed and timelines done. My students had a guest teacher today as I had professional development as part of the TRC grant. I'm a little concerned about how much they accomplished today in spite of having a wonderful guest teacher.
At my professional development a wordle appeared as a part of a presentation and it hit me. Those students who have everything done can make a wordle as a title page while they are waiting for the others to finish up.
I learned about making a fakepage...think that is what it is called. It looks like a facebook page but isn't a real one. I think pulling that into the project would be great. I wish I used it as the timeline instead of a "normal" timeline. If things go well tomorrow, maybe we'll try creating one.
Tuesday, November 1, 2011
Biography Project
We started a new project yesterday. Each child chose a biography to read. Today they started completing a graphic organizer. The first part of the organizer stores facts about the person's early life such as where and when born, siblings, and any other interesting information. The second part of the organizer stores information about why the person is famous or why a book would be written about the person. This has been harder as the students just want to write 'famous baseball player' or 'had a son' or some other 'easy' comment. We had a lot of discussions about this topic. Tomorrow they will complete the opinion and question part of the graphic organizer. They will tell whether or not they think the person should have a book written about his/her life and what would they ask the person if they could visit with him/her. They cannot ask something that was answered in the book or that can be googled.
Students will take this information and write a short report about the person. (We are using a second source...either History.com or Biography.com) A title page will be created along with at least four pictures to illustrate important points in the report. Each child will create a bibliography using easybib.com.
The title page and pictures will be used along with the report to make a 'paper-slide video' with a flip camera. Students will work together (we call it the production team) to video the papers as they are slid across the table as the report is read by the author.
A timeline is also being required. Students will use a graphic organizer to log events in the person's life. That information will be entered into the timeline feature on readwritethink.org and printed. The timeline will be the last thing shown on the video mentioned above.
Students will be graded on the research paper, the video, and the timeline. A rubric has been developed to grade the targeted areas.
http://mrscooksfantasticfourthgrade.blogspot.com/2011/12/flip-slide-videos.html
Wednesday, October 26, 2011
10 Page Stories to PDF files
For some reason the Publisher files are still huge as PDF files. One child's file was reasonable, the others have been huge. I changed the PDF file to a standard file which made it much smaller, but I'm concerned about the quality of the print.
Thursday, October 20, 2011
Ten Page Stories
Ten page stories are actually nine pages now, but I'm so used to calling them ten page stories the kids just let me get by with it. This year we started the stories on the computers instead of writing them on paper first. Students would write, print, edit with me, fix on the computer, write the next page, and go through the process over and over until each page had "done" written on it. Page 1 is the setting of the story; page 2 is all about the character. (This is the page that used to be two pages.) The character should be described physically and by using character traits. Page 3 is the first event of the story; page 4 is the problem. Page 5, 6, and 7 are all events trying to solve the problem. Page 8 solves the problem. Page 9 ends the story. I have a list of banned words for each page. Some of them include you, I, so, me, and many more.
Students are drawing illustrations for their pages. I taught them how to scan and they are scanning their pictures as they get them done. They know how to edit the pictures and they are inserting them into their document. (We used Publisher.) After we have all of the pictures inserted we will save the document as a PDF file and upload it to the publisher. Each child will get a free paperback copy of their illustrated story. They are pretty excited about being a published author.
Students are drawing illustrations for their pages. I taught them how to scan and they are scanning their pictures as they get them done. They know how to edit the pictures and they are inserting them into their document. (We used Publisher.) After we have all of the pictures inserted we will save the document as a PDF file and upload it to the publisher. Each child will get a free paperback copy of their illustrated story. They are pretty excited about being a published author.
Tuesday, October 11, 2011
New Google Search Stories
Next week we are going to create new Google Search Stories on the topic of immigrants to Kansas. Each pair of students will be assigned a group to research. They will "search" where the group came from, where they settled in Kansas, why they left their homeland, why they came to Kansas, what they found when they came to Kansas and when they came to Kansas. We will use the Read Kansas cards from the Kansas State Historical Society for our research. If we didn't have two district assessments pressing on us we would do more research and probably some other activities with the information. (Don't get me started on all of the assessments and the time they take from learning.)
http://www.youtube.com/mrscook387
http://www.youtube.com/mrscook387
Monday, September 26, 2011
Reading Large Numbers
I wanted the students to get a chance to work with PowerPoint and we needed practice with commas and reading large numbers. We combined the two in an project that will end up being a how to movie on reading large numbers. Yes, a movie.
First I walked them through creating text boxes, changing fonts/sizes, moving boxes, duplicating screens, and moving items behind or forward. We did the first 23 slides together. Seems like a lot but several slides only had one thing changed on them as we "walked" the commas to their spot in the big number and we labeled place value spots. The students were responsible for the last four slides. I expect the last four slides to duplicate theprevious last four slides we did together except the number should a new one. The first slide of the last four had the new number on it. The second slide had the millions place highlighted (by putting a yellow box behind the millions place) and the words reading the number were highlighted and typed below. The third slide had the thousands place highlighted in orange and the words highlighted in orange. The fourth slide had the ones, tens and hundreds highlighted in blue with the words for the numbers highlighted in blue below.
After completing the slides we saved our file and then saved it again as jpg files. To do this click save as and change the file type to jpg. PowerPoint will ask if you want one slide or all. We wanted all. All of the files were converted to jpg files and placed into a folder for later use.
We opened PhotoStory3 and imported our jpg files from the PowerPoint. We did all of them at once. To make it easy we changed our view of the jpg files in the folder to a list. We clicked the first file, pressed shift, clicked the last file and then clicked open. ( I think that is what the pop-up window said...)
Next we started adding the audio to our movie. Students were instructed to read the words on the slide but were also told they could had more verbal words if needed to make their how to video clearer.
Our last step will be to preview and make any corrections to the audio. Then we will create the video. I'm happy they will be ready for conferences.
I would have liked to completed this with Windows Movie Maker but the students use Netbooks and the Netbooks struggle to run WMM. Once we have the video done with PhotoStory3 we could convert the file and pull it into WMM on a bigger machine and add a credits screen. We'll see if we have time for that part. I only have one machine for WMM in the classroom.
Friday, September 16, 2011
Website
Here's a cool website to use with your students. It gives a word and the students have one minute to write about the word.
http://oneword.com/
Have you used this website? How have you used it?
http://oneword.com/
Have you used this website? How have you used it?
Update on Health Game
We ran out of time and did not get to put clip art on the cards. Actually we ended up with the students using my cards and they decorated the back. They started the cards, but there just wasn't time to finish them.


Original Post


Original Post
Tuesday, September 6, 2011
Health Game
Students will use Publisher to create a memory card game about nutrition. I'll make a template for them to use and they'll label the cards. They will also find clip art to use on the card that matches the term. I'll post an example when we get them done.
Wednesday, August 31, 2011
Using Publisher to create a graphic organizer
Instead of copying the graphic organizer for students to complete as a pencil/paper task the students created the graphic organizer using Publisher. It was a simple organizer and allowed the students an opportunity to practice using Publisher. Students created a text box with a border. A bold title was centered along with changing the font and size of the text. Students then changed the next line of text to align to the left of the box and toggled the bold setting off. The boxes were copied and pasted until all needed boxes were placed on the document. Headings were changed to fit the graphic organizer. Students then clicked in each box and added the applicable content to each box. A text box was added to the top of the document for the student's name.
The organizer had five boxes. Problem, Action, Action, Action, Solution
The organizer had five boxes. Problem, Action, Action, Action, Solution
Thursday, August 25, 2011
Thesaurus and Writing and Nouns
The students typed a simple sentence into Word. For example:
The little boy cried.
They highlighted little and right clicked. Then they looked at synonyms and clicked on thesaurus. They had a good time looking for a new word to use for little. Then we did the same thing for cried. Nothing came up but the word cry. We talked about it being the base word of cry so told the computer to look up cry. Once again they enjoyed the choices of words. We talked about having to add ed to the word because the sentence was past tense. The new sentences were definitely more interesting that the original.
One day we highlighted, copied and pasted a passage into word. We also copied and pasted the address so anyone looking at our paper would know where the passage came from. Then we practiced bolding words by looking for nouns to bold. We also changed the color of the text a few times just to get them familiar with it.

Friday, August 19, 2011
4th grade, 4th grade
Brown Bear, Brown Bear, What Do You See? (Bill Martin Jr and Eric Carle) You might think this book is too simple for 4th grade. I read it to my class and they loved it. I think the repetition was comforting and they loved the descriptions given the animals along with the illustrations.
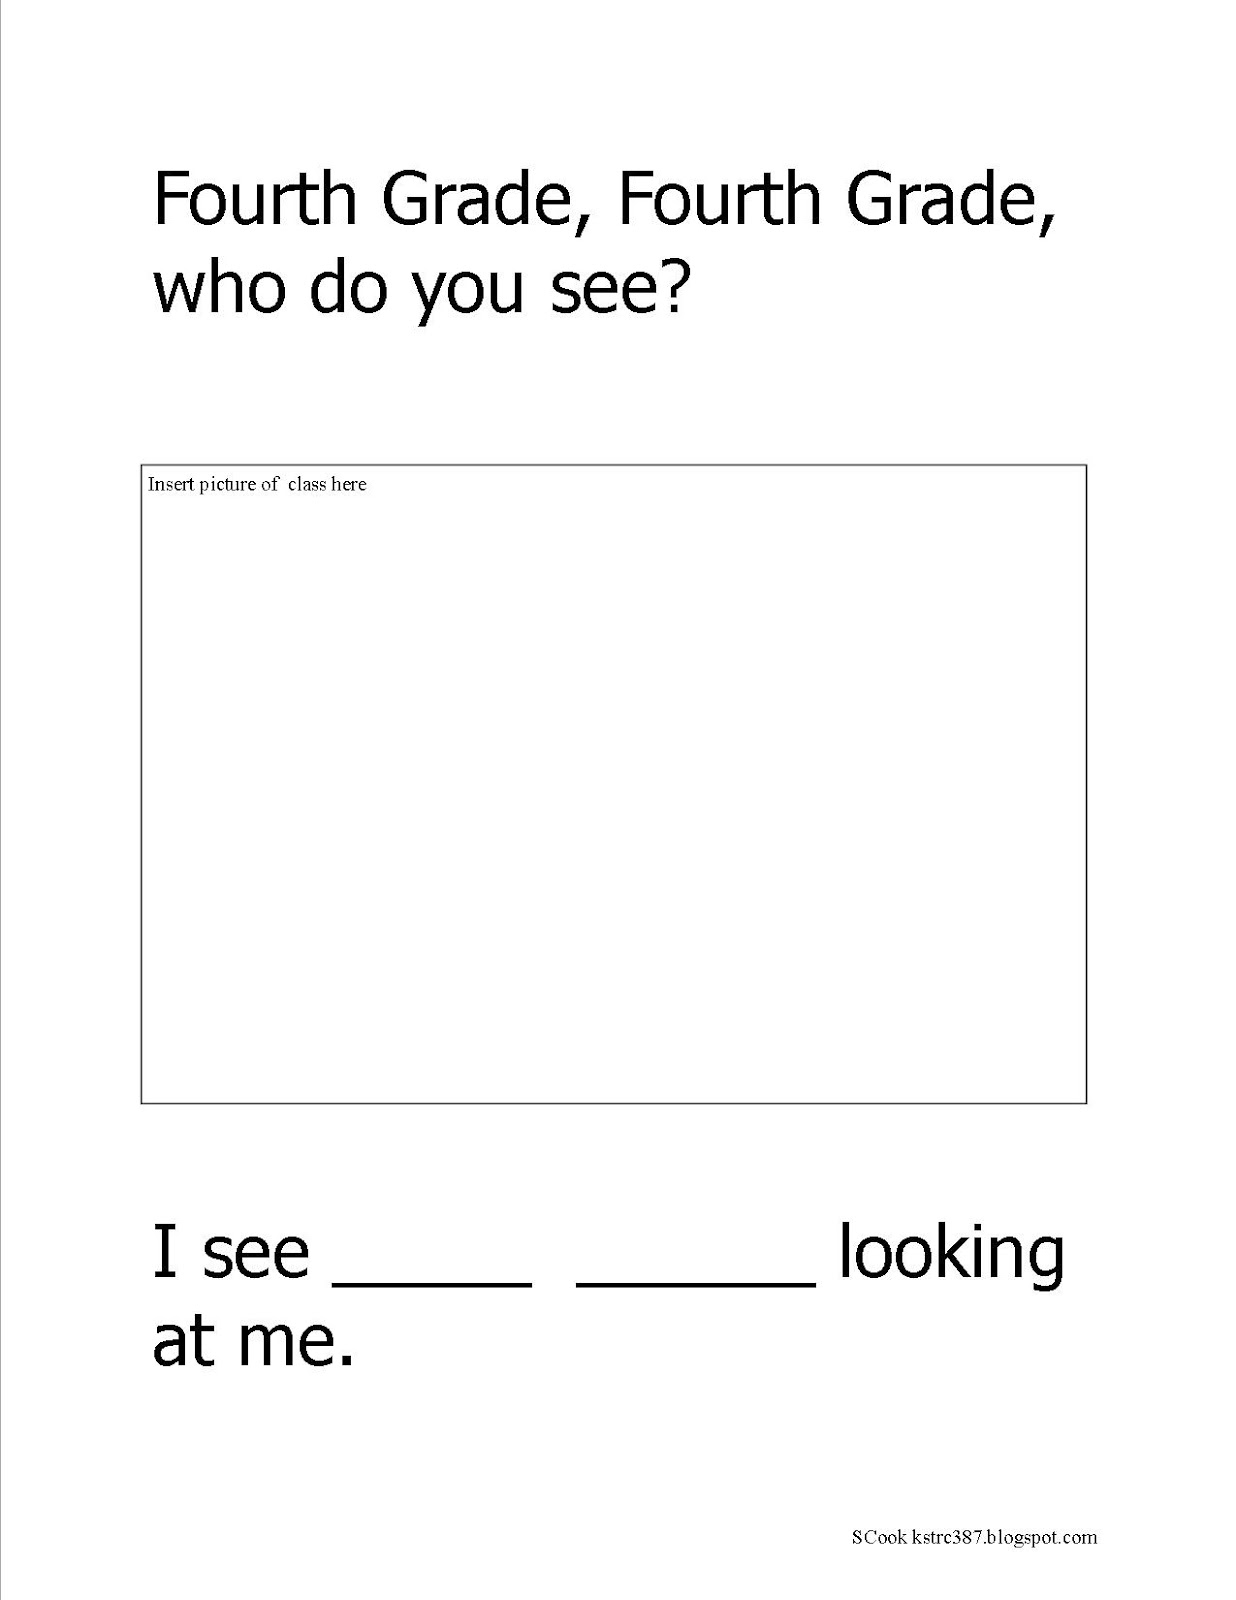
I read it to them because I wanted them to create a book. I wanted to create a book using the repetition to give students an opportunity to practice using Publisher and a chance to get to know their classmates. It kept the basic document the same which made it easier for me to focus on the technology skills. They had to find a document (the template I made) in the public folder. The file was renamed and saved in their document file. They highlighted and replaced text. They inserted a picture and re-sized it. They saved and printed their document. (Picture of template below.)
The students each have a number assigned to them in the classroom. The number goes on everything assigned to a particular student. The number is assigned after putting students in alphabetical order. So my first child in alphabetical order is given the number 1. Next gets 2 and so on. Students line up according to their number when we leave the classroom so they are familiar with their number and the students who stand near them in line. I used the class numbers for this project to make it easy to know who was "seeing" whom next.
Student 20 did Student 1, Student 1 did Student 2 and so on. I explained the students would create a page using the classmate who stood behind them in line. The last person in line (referred to as student 20 in this example) did the first student in line (referred to as student 1 in this example).
The first page started with Fourth Grade, Fourth Grade, who do you see? Then we put a picture of the class. The bottom of the page had the reply. I see Joyful Jamie (student 1) looking at me. (All student names are made up.) I made the first page.
Student 20 made the next page. Joyful Jamie, Joyful Jamie, who do you see? Student 20 put Joyful Jamie's (student 1) picture in the middle of the page. The reply was typed at the bottom of the page. I see Marvelous Mary (student 2) looking at me.
Student 1 made the next page. Marvelous Mary, Marvelous Mary, who do you see? Student 1 put Marvelous Mary's (student 2) picture in the middle of the page. The reply was typed at the bottom of the page. I see Incredible Ian (student 3) looking at me.
Student 2 made the next page. Incredible Ian, Incredible Ian, who do you see? Student 2 put Incredible Ian's (student 3) picture in the middle of the page. The reply was typed at the bottom of the page. I see Graceful Gloria (student 4) looking at me.
This continued for all students.
Student 19 put the reply at the bottom of the page as I see my class looking at me.
The last page of the book has our class name at the top and another picture of the class...I used a silly picture for the last picture and I created this page.
To help the students I gave each student a sticky note. They then checked the name tag of the person who stands in line behind them (as noted above). The name tag checking was to verify the spelling of the classmate's name. Then students grabbed a dictionary and looked for a positive word to use. The word had to start with the same letter as the classmate's name. Marvelous Mary, Incredible Ian, Right-handed Roger (We talked about alliteration.)
Students had to okay words such as acrobatic or jumping to describe their classmate.
Now each student had a sticky note containing the classmate's name and descriptive word. They opened the file containing the template I made for them using the first page verbiage. Students highlighted the words Fourth Grade and changed them to their classmate's name. Then the classmate's picture was inserted. Once we had that much done students saved the file. The next part was tricky for them. They tried to understand and I had to tell them to just listen and follow the directions. They had to "borrow" the sticky note of the person their page is about. So Joyful Jamie (Student 1) "borrowed" the sticky note Marvelous Mary (student 2) made. The borrowed sticky note had the name of the person to put at the bottom of their page. Once they highlighted and replaced the name at the bottom of the page they returned the sticky note to the person from whom it was borrowed. It sounds complicated, but it really isn't.
Each student saved and printed the document. It turned out to be a really cute book. Not only did it give us the opportunity to practice some tech skills, the project allowed us to discuss alliteration, follow directions, use a dictionary, and discuss why some names had a squiggly red line and some didn't.
We published two copies of the book. One was bound and the other was displayed across the wall by our classroom door. We left it up for the entire year.
Here is a photocopy of the template of the book. The students used page 3 (except for the last student who used page 4). I would save a copy of the document and delete the pages not needed for the students for a student template. (I would be glad to share the template. Leave me a message with your email address and I'll send it to you. I will NOT publish your email address.) Post a message to let me know how it works for you and I would love to know what changes you make to it.


Wednesday, August 17, 2011
New School Year
Today was the first day with students.
We used Publisher to make a name tag for desks. I made a template for the students to use. They opened the file and highlighted boxes to change information. They inserted a picture to personalize the name tag. The pictures had to be resized to fit in the box. The students saved the file and printed it. Since the name tags have student pictures on then, do I need a seating chart?
Tomorrow we are going to use Bill Martin Jr/Eric Carle's book Brown Bear, Brown Bear to create a book about our class. This will give students a chance to practice what we did today.
Brown Bear Brown activity
Friday we are going to work on a number book for a kindergarten class. Students will get to practice one more time the skills we learned using Publisher although instead of a picture students will use clip art to illustrate the numbers.
Thursday, May 26, 2011
Videos
It worked pretty slick for the kids to get everything done in PhotoStory3 that they could do. They used the flip cameras for video clips. I converted them to avi files and then we worked together on WMM to put all of it together. For no more time than they had to get everything done, they did a great job.
Saturday, May 21, 2011
Expectations Videos
In groups, students have been brainstorming expectations for different parts of our building and for our classroom. They are writing a song, a skit or just making a documentary about the expectations in the part of the building they requested or was assigned. They have planned what they are going to say, who is going to say it, what kinds of pictures/video they want and in what order everything should appear. They are taking staged pictures or making short video clips to illustrate the points they want to make. PowerPoint is being used to make title pages and/or information pages as they will save them as jpeg files and pull them into PhotoStory3. When they are done they will create a video which will be pulled into Windows Movie Maker. In WMM they will add any video clips and add credits. When they are done they should have a video for me to use next year to help explain expectations for the lunchroom, the hallway, the bathroom and other places in our building.
You may be asking, why PhotoStory3 and then WMM...the kids have netbooks and WMM doesn't work that great on them. We'll have to use the computer lab or take turns on the couple of laptops we have in the room for WMM. I try to keep their time on WMM as brief as possible so everyone gets time to edit and put a rolling credit at the end of their video. Rolling credits are pretty cool! :)
You may be asking, why PhotoStory3 and then WMM...the kids have netbooks and WMM doesn't work that great on them. We'll have to use the computer lab or take turns on the couple of laptops we have in the room for WMM. I try to keep their time on WMM as brief as possible so everyone gets time to edit and put a rolling credit at the end of their video. Rolling credits are pretty cool! :)
Monday, May 16, 2011
Choose Your Own Adventure Story
Students are currently working on a choose your own adventure story. I'm not sure they get it. I wanted to read a sample story to them, but it's been hard to get everything in due to the end of the year and everything that is going on. I hope to get a chance to read their stories tomorrow and see how they are doing. The stories are going on PowerPoint. That gave us a chance to learn how to do buttons. Of course, they love the buttons.
We also made another brochure. This one was about fractions. We made "posters" in Publisher about fractions. The posters were saved as jpeg files and pulled into the brochure. They love making brochures.
The students told me today they want to make a Voki. So, somehow we'll try to squeeze that in before the end of the year.
Thursday, May 5, 2011
Word Art Collage
I went to the TRC Celebration last week and learned pictures can be used to fill letters in word art. My brain has rolled that information around and around trying to think of a way to use that in the classroom. One of our vocabulary words this week was collage. We took all the pictures of the school year and created a collage. Students created their own using pictures they were in and I let them use the jpeg files they created of their work for previous projects. They made the collage in Publisher. We could have used PowerPoint and the next time I'll probably just use PowerPoint. We saved the collage as a jpeg file. We pulled the newly created jpeg file into PowerPoint (there's probably a faster way to do this but this is the way I did it this time). We cropped the write off of the edges and made a nice square/rectangle of the pictures. We stretched it to fit the screen and saved it as a jpeg. Then in a new PowerPoint file each student typed his/her name using WordArt. (This next part I'm not as sure of as I need to do it one more time to refresh my memory - so if it doesn't work, check back as I'll update this when I get a chance.) I think we right clicked on the word art and went to format text. After clicking fill we clicked photo and uploaded the photo. It's pretty cool. We saved it as a jpeg. In a new PowerPoint we pulled in the WordArt collage picture. We stretched it, saved it and printed it. I usually don't let the kids print in color for obvious reasons, but I let them print their name collage in color. What a souvenir they have of their school year. Someday I'll do this again...when I have a minute to think as I think we had a lot of steps we didn't need.
This can be used with vocabulary, too. Choose pictures to illustrate a word to make a collage and then pull that collage into the word using word art.
This can be used with vocabulary, too. Choose pictures to illustrate a word to make a collage and then pull that collage into the word using word art.
Wednesday, May 4, 2011
Using Glogster
I've wanted to try this all year. We finally are getting a chance to do it. I let the kids go out and create the background of their glog. We played with some of the features....just enough to get them really into it, and then I had them get out of the program. There was lots of grumbling going on. Now that they knew what they could do, I had them draw a "map" of their glog. The topic was butterflies. They know a lot about butterflies, we have lots of pictures and some videos. They told me the glog is better than writing a paper because it's on the computer and the computer is fun. (They wrote their paper on the computer...guess that doesn't count!)
Friday, April 22, 2011
Butterfly Final Projects
The students have completed their research and are compiling all their notes into a paper. Students typed notes into Publisher as they read and researched. The notes were written as a list of information. Students printed the notes, cut them apart and sorted them into categories. Then they glued them to notebook paper. Each category was glued to a page. Students know that each page will be a paragraph in their report. In addition to the information the students have compiled, they will include a quote or two about butterflies from a classmate.
They are excited to use the pictures we've taken as we watched the life cycle take place in our classroom. We feel fortunate to have captured a butterfly emerging using a flip video camera. We have some still pictures of butterflies emerging, too. Not only will the students be able to enhance their reports with actual pictures from our experiences but they will also have diagrams they have drawn and scanned. They have to have two labeled diagrams for their reports. One diagram has to show the body parts of a butterfly and the other must show the life cycle.
I can't wait to see their final products! Once the paper report is done, we'll start on glogs and add some of the video.
Tuesday, April 12, 2011
Butterfly Research
Since we have butterfly larva and are getting to witness the life cycle of a painted lady butterfly firsthand, we are researching butterflies. We've already read one short book, currently reading Butterfly Battle, a Magic School Bus book, and have read a couple of web sites. The students will compile all their notes into a paper complete with bibliography. They will also create a glog about butterflies. We were lucky enough to catch some larva turning into chrysalis today with the time elapse camera set at 30 seconds. We have some fabulous pictures to use. The bibliography is being compiled as we research and the bibliography is easy thanks to www.easybib.com.
Monday, April 11, 2011
Time Elapse Photos Update
It worked! I have 770 pictures from the weekend. We caught on "film" 4 larva turning into a chrysalis. I set the camera to take pictures every minute over night tonight. I hope I don't run out of space on the hard drive before the group being filmed tonight transform into chrysalis.
Jump Drives
We are lucky enough to recently obtain a jump drive for each student. I can't wait to get their files off of the public folders and on the drives. I taught the students how to find the jump drive and save to it today. How much simpler life will be with the jump drives.
Friday, April 8, 2011
Time Elapse Photos
Trying something new over the weekend. We have butterfly larvae in our classroom. They are getting close to creating their chrysalis. We put a light on six containers and we are using our document camera to take a picture every five minutes over the weekend. I have a new external hard drive saving the pictures. We'll see if we "catch" anything.
Wednesday, March 30, 2011
ABC Measurement Books Are Here!
Our books came today. I was a little concerned about how they would look since we used Publisher, converted the file to a PDF and then uploaded to the publishing company's website, but no reason to worry. They are GREAT! I'm very happy with them.
Sunday, March 13, 2011
Custom Google Search
We used a custom Google search when working on the fact/opinion games earlier in the year and again when we worked on the Kansas search stories. I like the custom searches as only the sites I put in the custom search are searched by the students. Ads still show up and guidance still has to be provided, but it narrows the search for the students.
The fact/opinion games focused on animals so the search included children friendly animal sites. I also included sites allowing use of their pictures.
Here's a link to the animal search.
http://www.google.com/cse/home?cx=009232587918217185025:z9yuz3jkzvm
Here's a link to the Kansas search. (We had to do some Google searching outside of the custom search. I need to work on this particular custom search.)
http://www.google.com/cse/home?cx=009232587918217185025:36be2zeduau&hl=en
Here's how you can make your own custom search. Go to Google.com.
Click on more, then even more.
Click on custom search. I make sure I bookmark the search site into my delicious account for easy access later. You can edit the search at a later time if needed.
Saturday, March 12, 2011
ABC Measurement Books
The books are done and ready to be submitted for publishing. As posted before, the students created the books using Publisher. All pages had two letters except the last two pages which had three. (The publisher lets us have 12 pages of content per book.) We brainstormed measurement words for each letter. Some letters were tough. We finally settled on number line for n and students were tying it to a ruler or thermometer.
We are getting the books published at StudentPublishing.com. We had books published there earlier this year and loved them. The software on the company's website is slow although it created a wonderful book. We have to use the company's site to create the cover page, the title page, the dedication page and author page. We uploaded our PDF file for the other pages. I like this method much better.
The last time I created a chart to keep track of each student's pages as they were reviewed by an adult. It was a long process checking each page of each book for each student and the software was slow. I'm not checking them as closely this time as I told the students THEY should have pride in their work and THEY should make sure everything is the way they want it. (We did do some editing with the Publisher file before converting the file to a PDF.)
The students uploaded the PDF file into their book at the publishing company's website. We should get the books in about 4 weeks.
Conference preparation
Because of snow days, our conferences have been rescheduled and shortened. I really want students to have the opportunity to show their parents their technology knowledge and projects.
We have four days until spring break and we are going to use the time to create a PhotoStory3 video about the school year. Friday we spent some time going through our electronic folders. We created a conference folder, deleted some files and converted some files to jpeg images. The jpeg files were placed in the conference folder.
We have had some trouble using PhotoStory3 with the netbooks because of the screen size. We've learned to go into the advance settings and change the screen resolution.
When I say we, I mean we. With adult guidance, they change the resolution. They create folders, delete files, and save files as the intended kind in the proper folder. (Their ABC books were created with Publisher and then saved as a PDF file.)
Back to the conference folder, students have some choice in the files for their video. Some files are not a choice. Each student will have a personalized video when we are done.
Monday we will work again in the electronic folder determining what can be trashed and what should be saved as a jpeg. During the rest of the week the students will write the script to go with their pictures, pull the pictures into PhotoStory3 and create their video. They are looking forward to it. I am, too.
Saturday, March 5, 2011
Another cool site

Too much fun! After rendering the words save the image as a picture on your computer.

Friday, March 4, 2011
Newsletter
I usually write a newsletter to send home each week. This week the students are going to write it. I picked a format from the templates Publisher offers. They'll title it and the content will be information about state testing tips. I hope this helps them remember what to do and I hope they share it with their parents since it will be authored by them.
Update: We had a lot of disruptions to our day and I was concerned we wouldn't have time to get the newsletter done so I created some text boxes in Publisher containing reminders of tested concepts. The students picked one of their pictures or a picture from one of the projects to put in the newsletter and wrote an article about test taking strategies. The students enjoyed creating the newsletter and seemed excited to show them to their parents.
Update: We had a lot of disruptions to our day and I was concerned we wouldn't have time to get the newsletter done so I created some text boxes in Publisher containing reminders of tested concepts. The students picked one of their pictures or a picture from one of the projects to put in the newsletter and wrote an article about test taking strategies. The students enjoyed creating the newsletter and seemed excited to show them to their parents.
Saturday, February 26, 2011
Fluency Graph example

Friday, February 25, 2011
Fluency Graphs
I wanted the goal (123 words) to appear on the students' graphs. I googled how to put a target line on a graph and found a solution that worked for me. There may be another way, maybe even easier than what we did, but I'm happy. We just added another column of data with the goal. The goal is listed with each entry. Now we have a line showing the target number and the students can see how close they are to the goal. They read to me today to get a new number to add to their chart. Maybe I imagined it, maybe it was real, but it seemed like they all tried a little harder. They've always been interested in their fluency (words read per minute) number, but now it has become a competition to get that WRPM above the target line. They love reading to me. They love getting their new number. They love using excel to chart their growth.
They are becoming so quick at figuring out how to follow me on the computer and how to use the computer. It might be time to allow them to gather more data about themselves. Maybe a timed test on multiplication facts. I wonder if a target line on their graph for multiplication facts would inspire them as much as the WRPM. Now to figure out what would be a reasonable goal for multiplication facts in one minute....
They are becoming so quick at figuring out how to follow me on the computer and how to use the computer. It might be time to allow them to gather more data about themselves. Maybe a timed test on multiplication facts. I wonder if a target line on their graph for multiplication facts would inspire them as much as the WRPM. Now to figure out what would be a reasonable goal for multiplication facts in one minute....
Thursday, February 24, 2011
Pictographs Done!

We collected new data for each student to create their own pictograph. We did this in about 20 minutes. Each student picked a topic and two choices to put with a category of other. I open the smart software and each student turned on their clicker. I put the topic and choices on the page and the students voted. When we were done each child had a bar graph with their data. They turned that data into a pictograph. This time they did the skeleton along with the guts. :)
Wednesday, February 23, 2011
Creating a line graph
We have an ongoing line graph displaying fluency scores. Each week the students read to me for one minute and I count the words per minute. The students are using Excel to log their data and create the line graph. We had some problems on some machines with the graphs displaying the data properly. Those problems appear to be fixed (the grant facilitator took the machines and worked on them so I don't know the 'fix') and we learned how to print the graph alone or with the data.
One of the things I learned with the kids is to make sure they know how to write a date using slash. The students used a back slash which didn't work so well. Interesting.
One of the things I learned with the kids is to make sure they know how to write a date using slash. The students used a back slash which didn't work so well. Interesting.
Pictographs
Today we are going to learn about pictographs. Students will collect data and create their own pictograph about ice cream today. I debated allowing the students the opportunity to create their own graph outline (the box part) or have that part done and students then complete the content. I'm going with complete the content for today. If things go well and we have extra time, I'll show them how to create the box part of the graph.
Story Element Web

Saturday, February 19, 2011
Compare/Contrast
We read a story out of Treasures (our reading series) that was perfect for comparing and contrasting. I created a venn diagram (to keep students from spending too much time making perfect circles and a 'perfect' diagram) using Publisher and students created text boxes to place the information. The students continue to amaze me with how quickly they create text boxes, change the font/size, type the information and adjust the box to the perfect place and size. But not only do they amaze me with their technology skills, they amaze me with their content knowledge. After gathering and placing all the data on the diagram, the students created a text box at the bottom of the diagram cutting the bottom fourth of the diagram out of the picture. Well, it was 'cut' out of the picture after students filled the text box with white. The white text box was used to write a paragraph about the information using compare/contrast signal words. Signal words were bolded.
Friday, February 18, 2011
Audacity/Update on Youtube/Google
Our account was "reinstated" allowing us to upload a few videos on making change. :)
Have you used Audacity? This is one of my favorite free programs. I look forward to continuing to explore the possibilities for this program. So far I have used it for fluency practice. Students record a passage or the week's story in the program. Then they listen to their recording while following along. Sometimes I time them to see how many words they can read in one minute. Last week after students wrote and edited a passage. They opened Audacity and recorded their writing. They stopped the recording and played it while following along with their writing. The purpose behind the activity was allow to students another chance to edit their writing.
Have you used Audacity? This is one of my favorite free programs. I look forward to continuing to explore the possibilities for this program. So far I have used it for fluency practice. Students record a passage or the week's story in the program. Then they listen to their recording while following along. Sometimes I time them to see how many words they can read in one minute. Last week after students wrote and edited a passage. They opened Audacity and recorded their writing. They stopped the recording and played it while following along with their writing. The purpose behind the activity was allow to students another chance to edit their writing.
Tuesday, February 15, 2011
Technical Difficulties
There are days I don't like technology very much. This am was one of those times. I needed a project to challenge some students while allowing me to work with others. The project I settled on was another Google Search Story only this time about math. Students created a word problem about money and making change. When the first one finished I tried to sign in to the class Google/Youtube channel and I couldn't remember the passcode. I kept trying and eventually discovered the Google account has been disabled. I sent Google an email to see if they would reinstate it, but I haven't heard back yet. That was very frustrating. I had several students ready to upload their projects by the time I discovered the account was disabled. There's no way to save their work. Thankfully they had everything in a word document so all they'll have to do is retype when we are able to get the account going again. Still, it was frustrating. Next we worked on the ABC measurement book. The computer connected to the scanner wouldn't allow the students to log in because the security log was full.
Saturday, February 12, 2011
Downloading Pictures/Scanner/Misc
I finally started showing the students how to download pictures from the digital camera. I don't know why I waited so long other than we've had so much going on it has been hard to get everything done. They are doing fabulous downloading pictures. They are also doing fabulous scanning.
I don't know when we'll get the text feature brochures done as the ABC books take up what little free time we have. We also have to work in extra practice for the state test. In social studies we are working on the three branches of government so we will make our first brochure about our government.
I don't know when we'll get the text feature brochures done as the ABC books take up what little free time we have. We also have to work in extra practice for the state test. In social studies we are working on the three branches of government so we will make our first brochure about our government.
Tuesday, February 8, 2011
Text Feature Brochure
My friend Laurie just told me about her class using Publisher to create text feature brochures. Hmmm, I think we have another project waiting in the wings!
ABC Measurement Book....Again!
We started it today. The images in the book are expected to be a variety of clip art, photos taken by student or classmate, images used with permission from internet or illustrations drawn by child, scanned and uploaded to document. Each page will have a sentence with some sort of measurement statement and measurement units should be matched with a measurement tool and vice versa. We are using Publisher to compile all of our information. My para helped students scan their illustrations and it wasn't long before the students were scanning on their own.
Before illustrating our words we brainstormed measurement words using an ABC chart when we read Measuring Penny. We looked at posters in our room for more words. We had to "stretch" some words in order to have at least one word for each letter of the alphabet. I gave the students a template to help them organize their page. I also gave each child a "half spiral" notebook for page planning. (I bought a bunch of spiral notebooks for a nickel one year...I found a place to get them cut in half. Make for nice little notebooks. And.....the students think they are FUN! :) )
Before illustrating our words we brainstormed measurement words using an ABC chart when we read Measuring Penny. We looked at posters in our room for more words. We had to "stretch" some words in order to have at least one word for each letter of the alphabet. I gave the students a template to help them organize their page. I also gave each child a "half spiral" notebook for page planning. (I bought a bunch of spiral notebooks for a nickel one year...I found a place to get them cut in half. Make for nice little notebooks. And.....the students think they are FUN! :) )
Sunday, February 6, 2011
ABC Measurement Book
My principal bought us a scanner to use. I think we will use a combination of freehand art scanned into the computer along with Publisher, maybe PowerPoint to create the ABC book. I may let the students decide which program to use. The more I think about that idea the more I like it. What a great opportunity to learn about features of a program and use our compare/contrast skills. I'm thinking the students will save their pages as a PDF which can be uploaded into a student publishing company's website for actual paperback copy publication. Because the student publishing company limits the books to 12 pages, students will have to put 2/3 letters on a page. Should I really take this on before state testing? One of our weaker concepts in the past has been measurement and measurement tools. I think we will take this on before testing. It will be a fun project top help relieve stress while at the same time review needed concepts.
Wednesday, February 2, 2011
New Projects - ABC Measurement Book/Character Trait & Avatar
I want to make an ABC book using measurement terms. I'm struggling with how to pull technology in to this besides the obvious use of using the computer as a word processor. (Does that sentence make sense???) What should the final product be? A powerpoint? A paper copy of a book? Ideas anyone?
We are getting ready to create a character and describe a trait about the character. The reader of the paragraph should be able to guess the character's trait based on the description of the character and/or character activities. The actual word for the trait cannot be used in the paragraph. I did this last year and they were great. This year the students are going to make an avatar of some kind to go with the description. I have a student teacher who will do this project with the class. I'm looking forward to seeing the end product.
We are getting ready to create a character and describe a trait about the character. The reader of the paragraph should be able to guess the character's trait based on the description of the character and/or character activities. The actual word for the trait cannot be used in the paragraph. I did this last year and they were great. This year the students are going to make an avatar of some kind to go with the description. I have a student teacher who will do this project with the class. I'm looking forward to seeing the end product.
Google Search Story
We finished our search stories. Here's a link to them.
http://www.youtube.com/user/MrsCook387
Now we are helping the third graders create stories about Wichita.
Here's the link to make your own.
http://www.youtube.com/user/SearchStories
http://www.youtube.com/user/MrsCook387
Now we are helping the third graders create stories about Wichita.
Here's the link to make your own.
http://www.youtube.com/user/SearchStories
Saturday, January 22, 2011
PhotoStory3
The students are close to finishing their PhotoStory3 projects. After reading Snowflake Bentley students came up with facts about snow. Because of snow days and other interruptions to our time we chose three facts as a class and then in our teams students worked on a storyboard to create their PhotoStory. Originally I wanted each student to create his/her own story.
We used PowerPoint to create 8 slides. Slide 1 is the title slide, slide 2 has the first fact on it, slide 3 is for the fact from slide 2 turned into an opinion, slide 3 has the second fact on it, and that continues until slide 8. Slide 8 is the credit slide. The book Snowflake Bentley is listed along with a website we will use for snow pictures. The website contains copyright free pictures. Once the slides were created (pictures were NOT added to the powerpoint and the slides with the opinions did not have the opinions written yet) they were printed. As a team students wrote the narrative for each slide by the slide on the printed paper. The opinion slides had the opinion written by hand in the slide.
Once the students have their storyboard completed they will choose the picture to go with the facts and opinions. A picture will be selected for the title and credit slides, too. The picture information will be noted on the slide. Then students will create the PhotoStory3 using the information from their storyboards. Each team is responsible for one PhotoStory.
The projects should be finished this week...which is good as we are starting a new project - the one described in the previous post.
Google SearchStory
This coming week we are going to start a new project to practice main idea and details. January is the birth month of Kansas so students will use information about Kansas to create a main idea and detail list. The list will then be used to create a Google SearchStory that ends up on Youtube. I'll post a link to our creations when we are done.
We read a book about Kansas and listed important and interesting things after each page. Next we will choose one idea from the list to create a main idea and supporting details. I think I will ask students to write a paragraph using the information to put with the SearchStory.
We read a book about Kansas and listed important and interesting things after each page. Next we will choose one idea from the list to create a main idea and supporting details. I think I will ask students to write a paragraph using the information to put with the SearchStory.
Thursday, January 6, 2011
Publisher
We've used Publisher a lot this year for story mapping, webs and more. We use callouts to create webs. They amazed me the other day when we created a web to document the main idea and details of an article. Wow, we just breezed through it.
A new project
I know, I know....I'm behind. Here's one project we recently completed. It was difficult to accomplish the way I wanted as I was continually pulled out of my classroom for various reasons. In spite of the difficulties, the students did a great job. The students studied the water cycle. Their task was to tell the story of the water cycle and use a drop of water as a character in the story. They used Paint to illustrate the story and PowerPoint was used to tell the story. I was amazed at how well they did with the illustrations. A basic illustration was created and saved. That file was then saved as a part of the water cycle...for simplicity let's call it evaporation. The student then illustrated evaporation on the on basic illustration. That was saved (as evaporation). Then the evaporation file was saved as condensation. The condensation file was illustrated with condensation. The condensation file was saved and then saved as precipitation. Precipitation was added to the illustration. The file was saved and then saved as collection. The collection file had an arrow added to point to the area of the illustration showing collection. The file was saved. The illustrations were pulled into Power Point and the students used the basic illustration for a title page. Each of the other illustrations were pulled in as the student told the story. Some students created their character using paint and then added the character to their slides to help illustrate the story.
Subscribe to:
Comments (Atom)